Cool pi 4B & CM5 探索快速安装系统新方法
-
提个建议,在备份完成后,输出相应的结束提示(eg. Backup completed.)。
目前什么都没有
-
@edwardzhou 好像是直接关机了
-
@edwardzhou 提示在显示器输出进度,当然也可以修改console切换到串口输出
-
This post is deleted! -
This post is deleted! -
This post is deleted! -
@大法师 said in Cool pi 4B & CM5 探索快速安装系统新方法:
@xingzhan2012
欢迎验证系统备份功能假定手上有两个U盘,一个制作为系统初始化安装U盘A,另一个制作为系统备份U盘B。
当用户在系统中安装或修改各种配置操作后,如需要备份保存系统,那么请关机,插入备份U盘B,开机自动完成备份操作(备份文件在backup目录)。
当用户想恢复备份的系统到coolpi 4b板载的存储emmc,那么可以将备份U盘B中的backup目录内容拷贝到安装U盘A install目录(请注意先删除install目录文件),插入安装U盘A,开机自动完成系统安装操作。
@大法师
ubuntu20 server版测试过吗?装好所需配置后,插入制作好备份U盘B,然后重启,毫无变化,还是直接进入LOGIN:
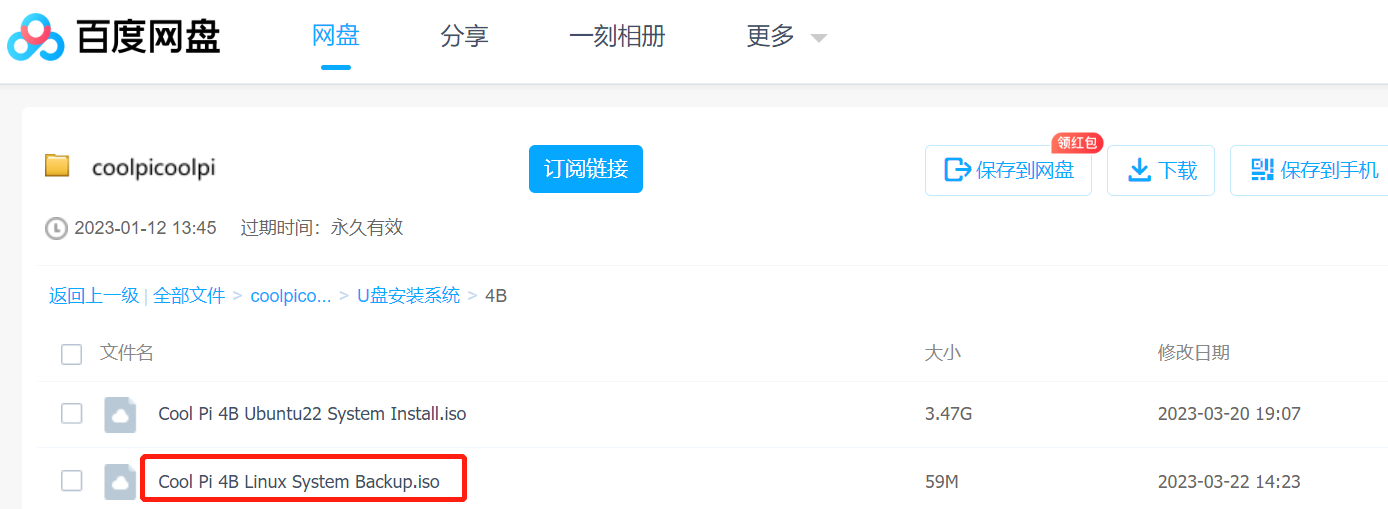
20230115-ubuntu-20.04-preinstall-server-arm64-coolpi
我装的这个版本的系统,增加一些个性化驱动软件后,想备份一份,方便后续直接安装。 -
@AugustRobot_Zou 启动或备份U盘插到U3下层那个端口。备份操作与emmc内安装的系统没有强相关
-
@jack_admin 可以了,谢谢!确实只能USB3.0下方那个口。我之前切换过usb2.0、3.0上层端口都不行。
-
最近一直在用这个方法,非常太好用太方便了。
我对上面的备份安装放在同一个U盘实现的方法,做了一些改进,通过启动菜单选择 备份 还是 安装, 比每次去改 initrd.img 要方便很多。
步骤1. 编辑 /extlinux/extlinux.conf 如下
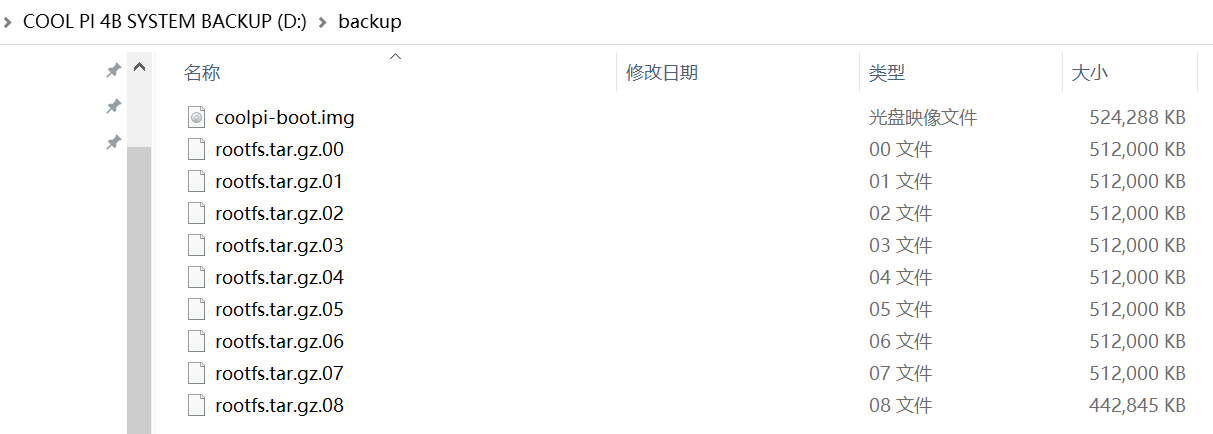
menu title Select the boot mode
TIMEOUT 60
default Linux coolpi backup

label Linux coolpi backup
	kernel /Image
	initrd /initrd-backup.img
	fdt    /rk3588s-cp4.dtb
	append root=LABEL=writable rw rootfstype=ext4 console=ttyS0,115200n81 quiet splash plymouth.ignore-serial-consoles vt.global_cursor_default=1 irqchip.gicv3_pseudo_nmi=0 net.ifnames=0

label Linux coolpi install
	kernel /Image
	initrd /initrd-install.img
	fdt    /rk3588s-cp4.dtb
	append root=LABEL=writable rw rootfstype=ext4 console=ttyS0,115200n81 quiet splash plymouth.ignore-serial-consoles vt.global_cursor_default=1 irqchip.gicv3_pseudo_nmi=0 net.ifnames=0
步骤2, 把 install 中的 initrd.img 复制过来,并改名为 initrd-install.img
步骤3, 把 backup 中的 initrd.img 复制过来,并改名为 initrd-backup.img
U盘查到板子上,上电启动。
你局可以看到菜单Capacity: 30436.5 MB = 29.7 GB (62333952 x 512) ... is now current device Scanning usb 0:1... Found /extlinux/extlinux.conf Retrieving file: /extlinux/extlinux.conf reading /extlinux/extlinux.conf 629 bytes read in 39 ms (15.6 KiB/s) Select the boot mode 1: Linux coolpi backup 2: Linux coolpi install Enter choice:输入1 或 2 回车即可,默认是1, 60秒无输入,则自动启动backup
-
@AugustRobot_Zou 我一直插的是USB3.0的上面的端口,能正常启动。
-
@edwardzhou said in Cool pi 4B & CM5 探索快速安装系统新方法:
@AugustRobot_Zou 我一直插的是USB3.0的上面的端口,能正常启动。
你的主板刷了新版本的loader
-
-
@xingzhan2012 loader阶段选择是在串口上操作
-
@jack_admin 我有个疑问,我用SD卡部署的系统,做好安装盘。然后能在EMMC卡上自动安装吗?
我理解应该不行吧?SD和EMMC的block名字不一样,还是说安装脚本会自动识别修改 -
@AugustRobot_Zou 通过u盘方式可以按优先级自动安装
-
进入ubuntu的默认密码是什么?
-
@wuming coolpi/coolpi
-
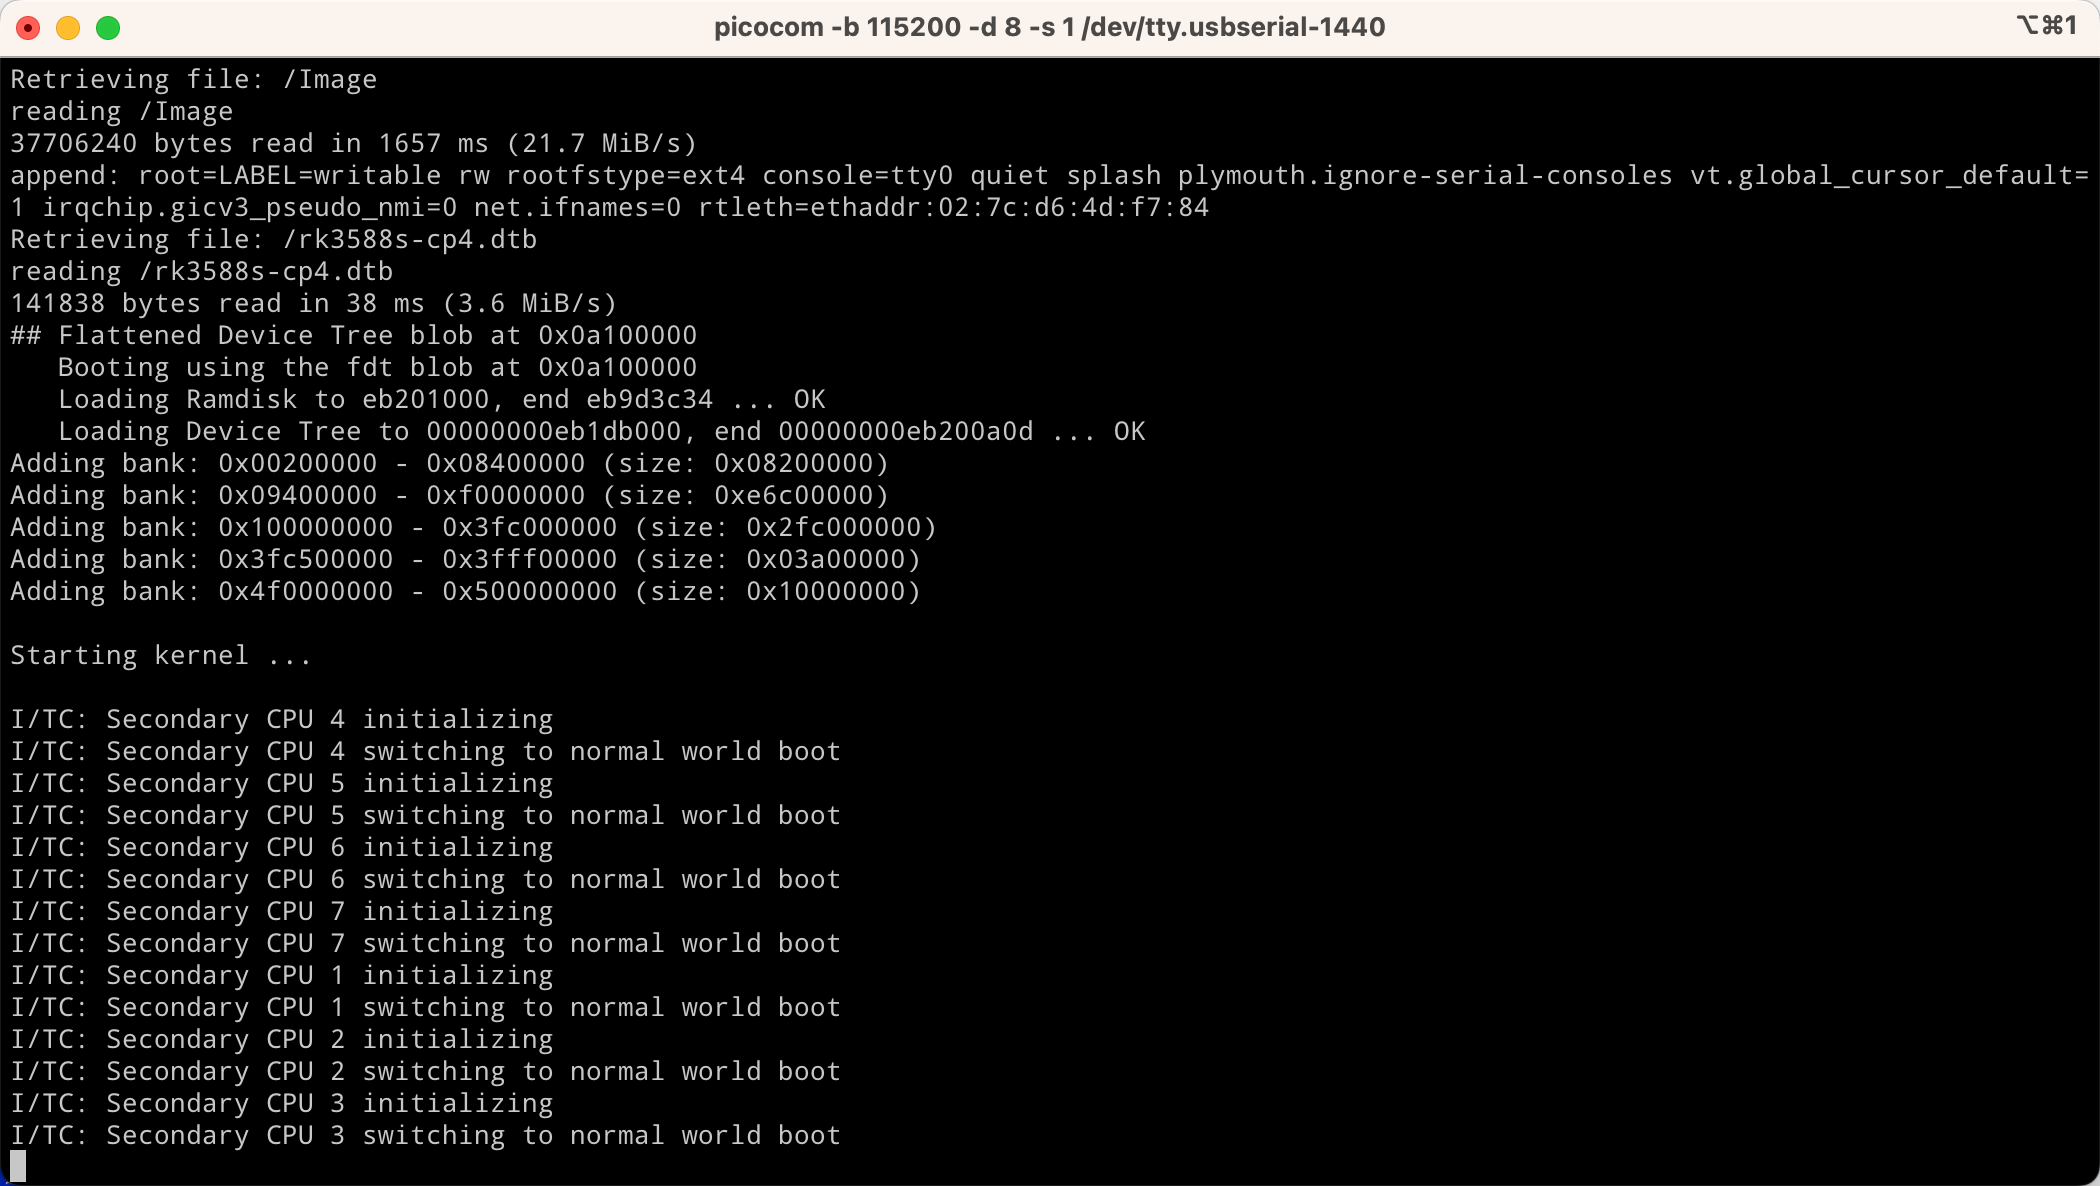
@大法师 我把console=tty0改成了ttyS0,115200n81,但是串口还是没有输出调试信息
-
@Twsuts 主板是4B还是CM5,串口启动信息发一个